NDEV
The NDEV (Model Number: RVT-001) is the main development unit used in Wii game development. It is a client device that runs games off a host computer.
Several revisions are known varying between the amount of wired controller connectors and other differences. Examples shown here are performed on an NDEV 2.1.
This setup guide is based on jakeeeenator's guide formerly found on Assembler.com. Sadly this site has gone and does not cover using the unit
with operating systems newer than Windows XP.
Technical Specifications
- RAM: 192MB (MEM1: 64MB (Retail 24MB), MEM2: 128MB (Retail 64MB))
- DVD: None, emulated by host computer
- 3 client USB ports: USB(DEBUG), USB(DI), USB(COM)
- 1 Serial Port
- 1 - 4 Wired Bluetooth connectors
- Wireless Bluetooth
- Dipswitch
- BT Mode Switch
- All other hardware properties of a retail unit (only lacks an optical drive)
Setup Guide
Requirements
Due do copyright reasons I can't provide any SDK files here.
- NDEV Unit (duh)
- 3 USB Cables Type B - Type A (2.0)
- A Computer running Windows (XP or Higher)
- Nintendo Revolution SDK
- NDEV driver installer
- cmonkey's dol2elf application
Installing the NDEV Drivers
If you are using a version of Windows newer than XP you might encounter an error installing the required drivers.

This requires you to launch Windows via the Advanced Boot Menu in order to install unsigned drivers.
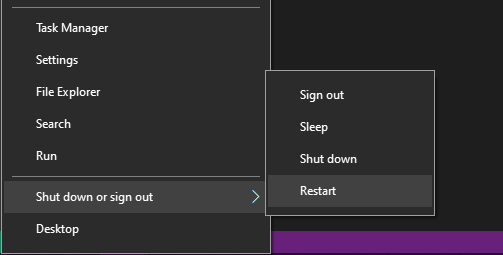
- Press Win + X, navigate to Shutdown or sign out and then hold Shift AND Left-Click Restart.
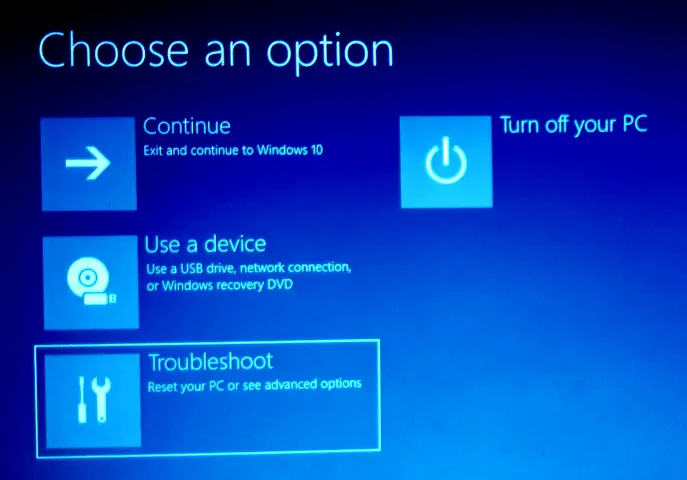
- You should be greeted with a screen saying Choose an option. Select Troubleshoot.
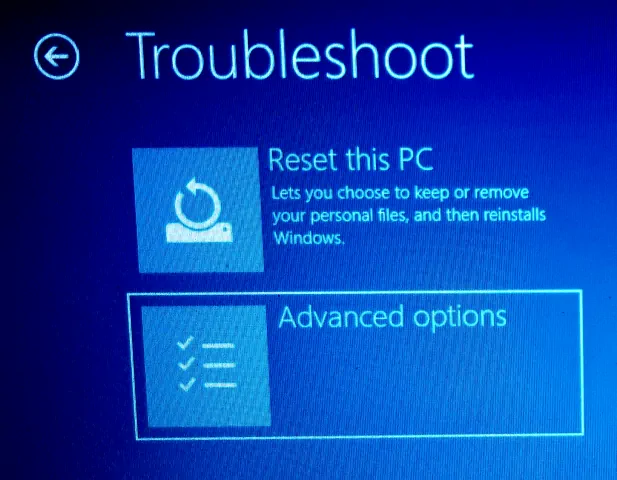
- Now, select Advanced Options.
- Next, select Start-up Settings.
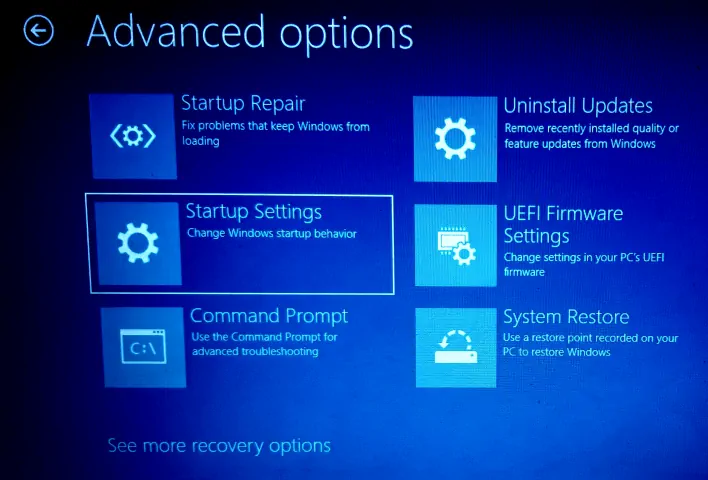
- Click the Restart button in the bottom-left corner.
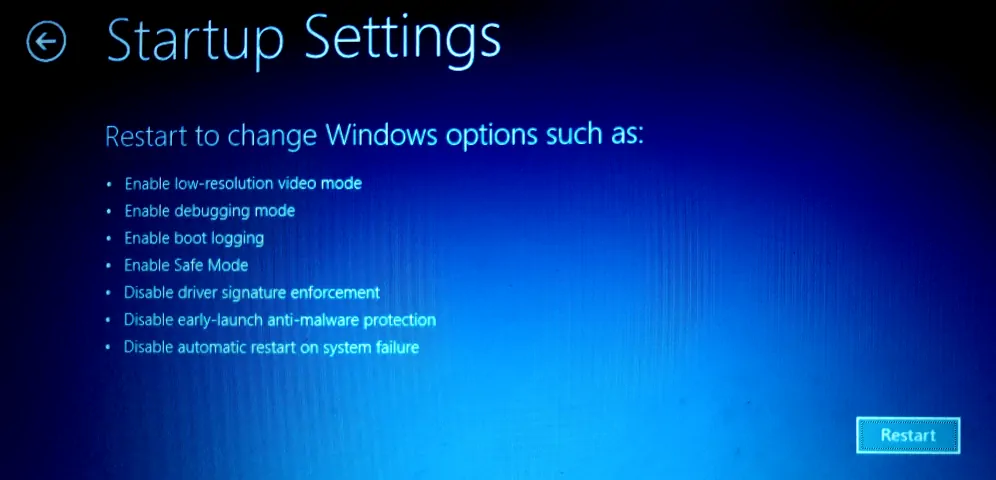
- After restart, press F7 on your Keyboard to Disable driver signature enforcement.
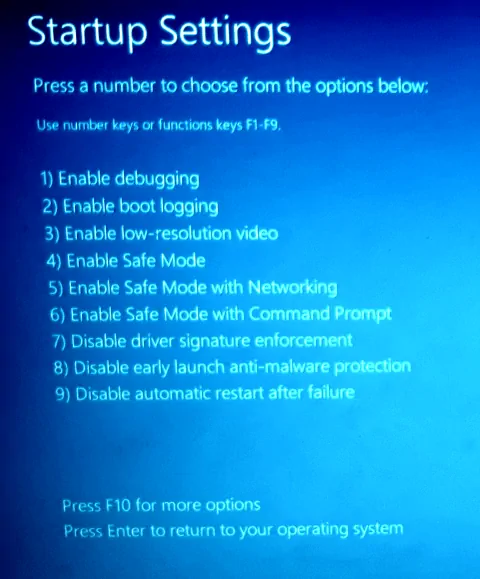
Now, Windows should boot up and you can run the installer (DPInst.exe) from the ND-Drivers-Win64-[some number] folder.
If successful it should look like this:

Installing the NDEV Software
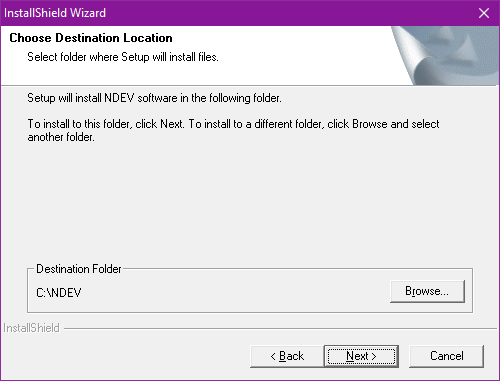
- Run the installer (Setup.exe) from the ND-Installer-[some number] folder. Select your language and install everything to C:/NDEV
- On your C-drive, create the following folder structure: C:\blt\tools\third_party\wii\
- Copy and paste the folders CW_RVL and RVL_SDK from the SDK into there.
- Now you need to set the following enviroment variables:
CWFOLDER_RVL for C:\blt\tools\third_party\wii\CW_RVL
REVOLUTION_SDK_ROOT for C:\blt\tools\third_party\wii\RVL_SDK
And, check whether the variable NDEV has been set for C:\NDEV as well as NDEV_TOOLS for C:\NDEV\bin
If they are missing add them manually.
This should complete the installation.
Usage Guide
Preparing a Game
You can't just get a game on your computer and stream it to your NDEV. It has to be prepared for that first.
- Go to the folder where dol2elf is saved. Create a main.bat file with the contents of:
dol2elf.exe main.dol main.elf
and a boot.bat file with the contents of:
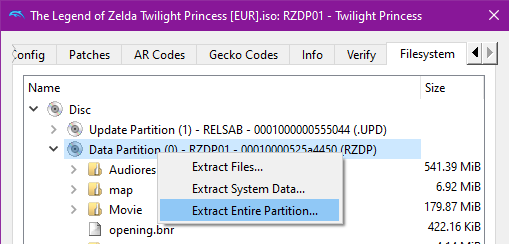
dol2elf.exe boot.dol boot.elf - Extract a game's data partition. I use Dolphin for that. You can also use other tools like Wiiscrubber as well.
- Go to the game's sys folder and check whether it has a main.dol (game) or boot.dol (Homebrew)
Copy and paste the dol2elf.exe and the main.bat or boot.bat to the sys folder of the game and double click the .bat. It should generate a main.elf or boot.elf file. - Delete the dol2elf.exe and .bat file from the sys folder since they are not needed for this game anymore.
Running a game for the first time
- Connect the NDEV unit to your computer with the 3 USB cables.
- Connect the NDEV unit to your TV.
- Turn on the TV and switch to the source where the NDEV unit is connected to.
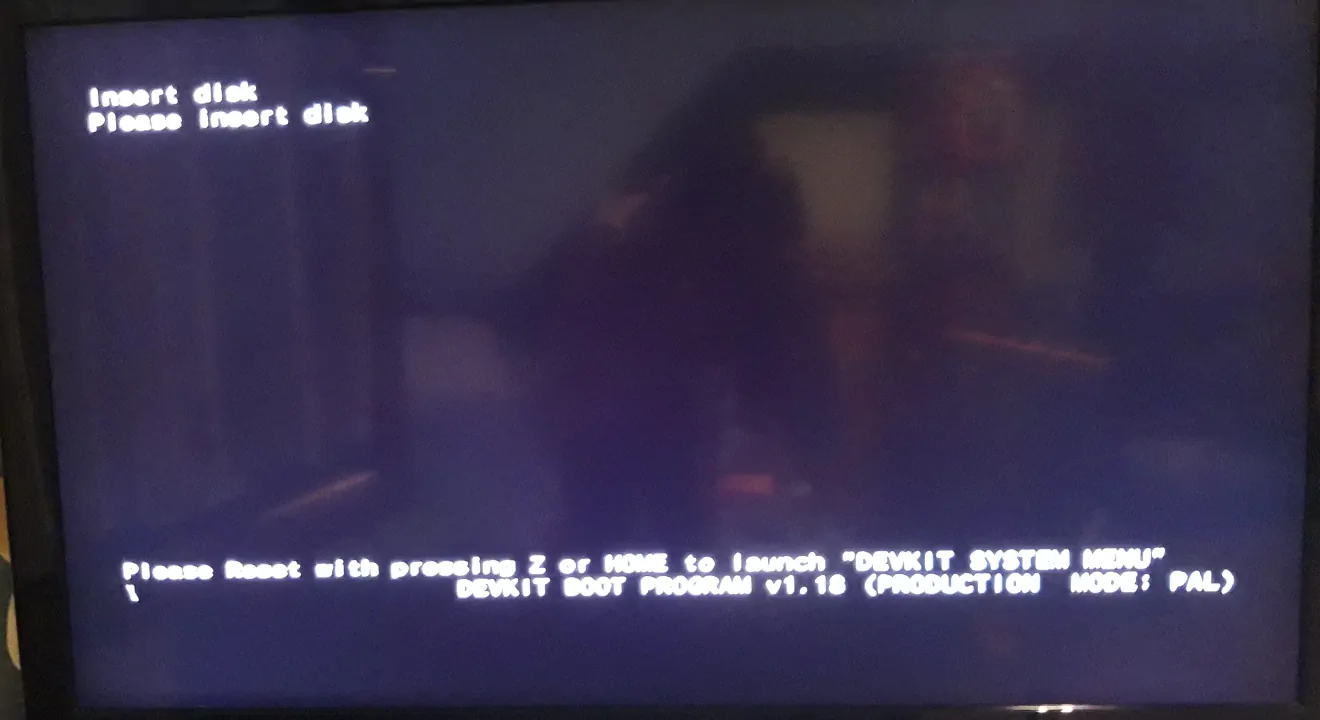
- Turn on your NDEV unit and wait for 20 - 30 seconds until you see the following on your TV Screen:
- Open CMD and set the game's files folder as DvdRoot by typing: setndenv DvdRoot [path to the game's files folder]

- Now, navigate to the game's sys folder using cd and type ndrun main.elf if it's a game or ndrun boot.elf if it's a homebrew app.
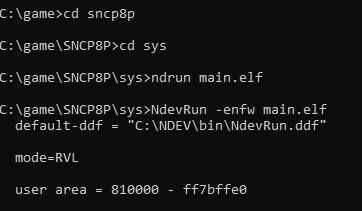
- The game should start now. You might have to press the start button on your controller.
Running a game another time
After executing the ndrun command for the first time makedol will create a .dlf file. This can be used to launch a game without CMD but the NDEV Optical Disk Emulator. A shortcut for this application should be created on your desktop during the NDEV software installation.

You can also use it to run .gcm isos (no GameCube software). Once opened click the icon with the 3 discs on it to select a .dlf or .gcm file. Click the Eject button to "insert" or "eject" the game.
